Mod's Build Log

Perforated & bubble cap plated columns

Mod's Build Log

Postby Modernity » Mon Mar 05, 2012 5:40 pm

I have decide to put my hand into the fire and post my plan.

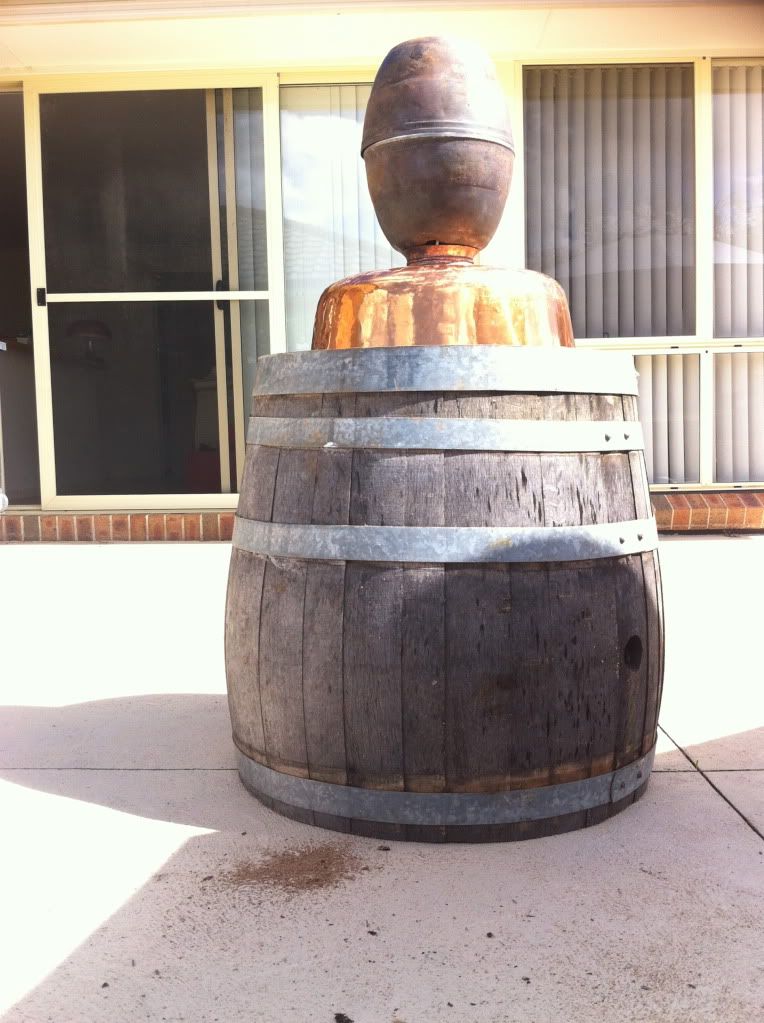
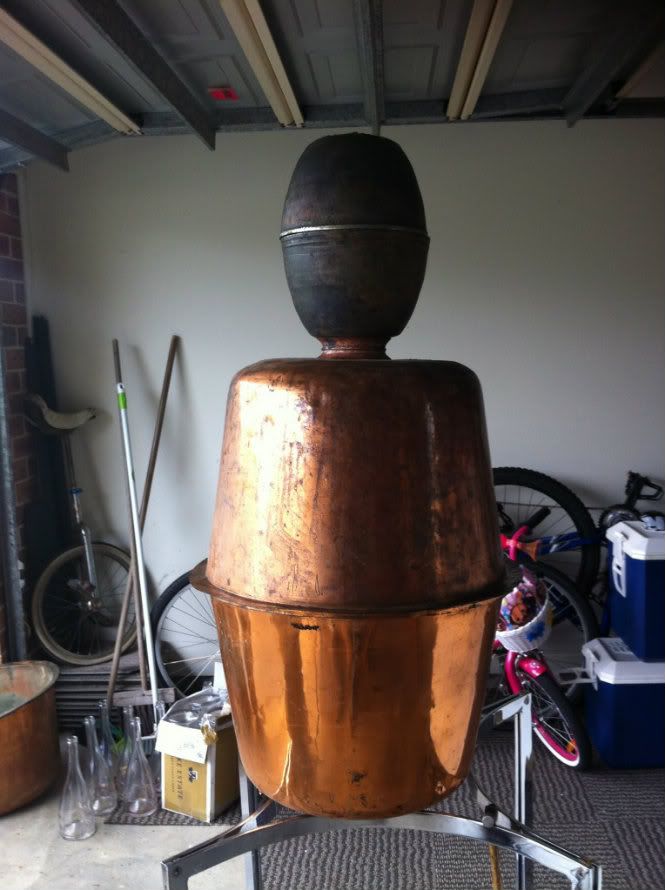
What I have drawn is a designed to be a dual purpose rig.
Image

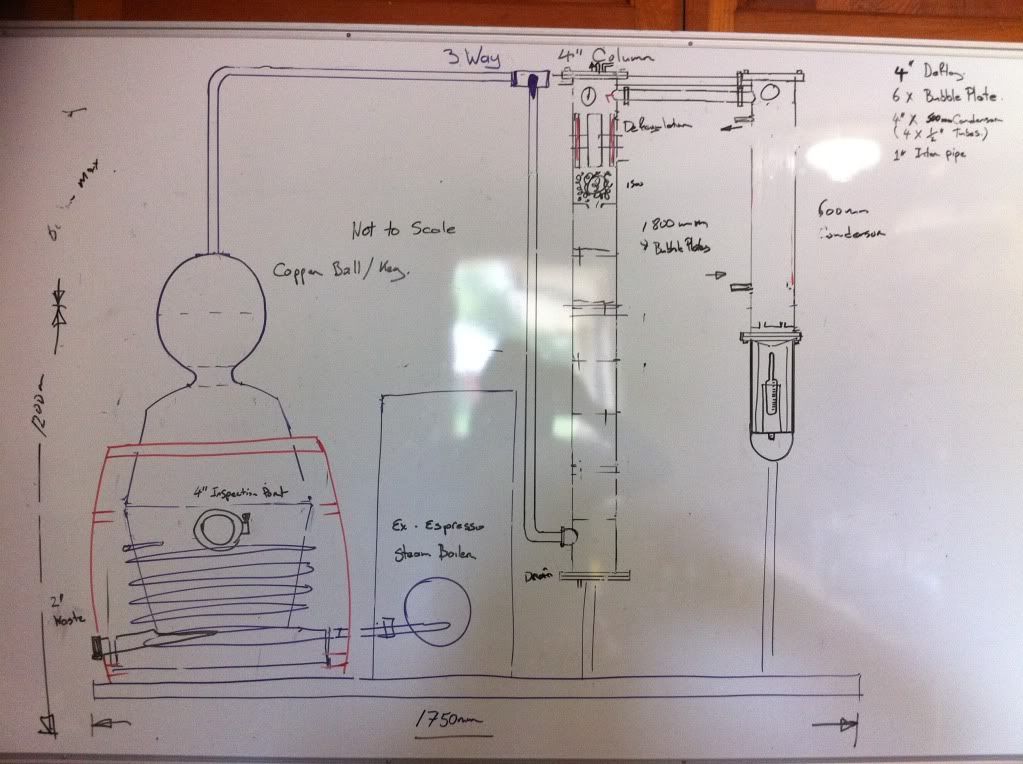
I wanted a copper pot boiler with the option of running straight to the condenser on the right via a three-way ball valve. With just the ball to give a bit of reflux.
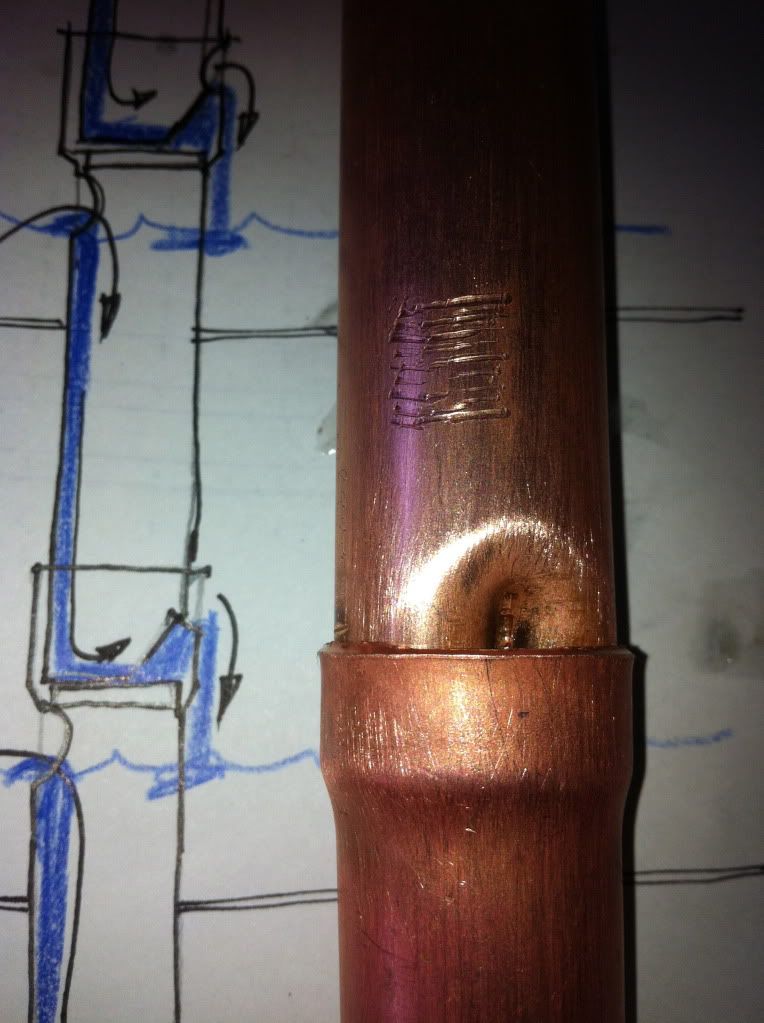
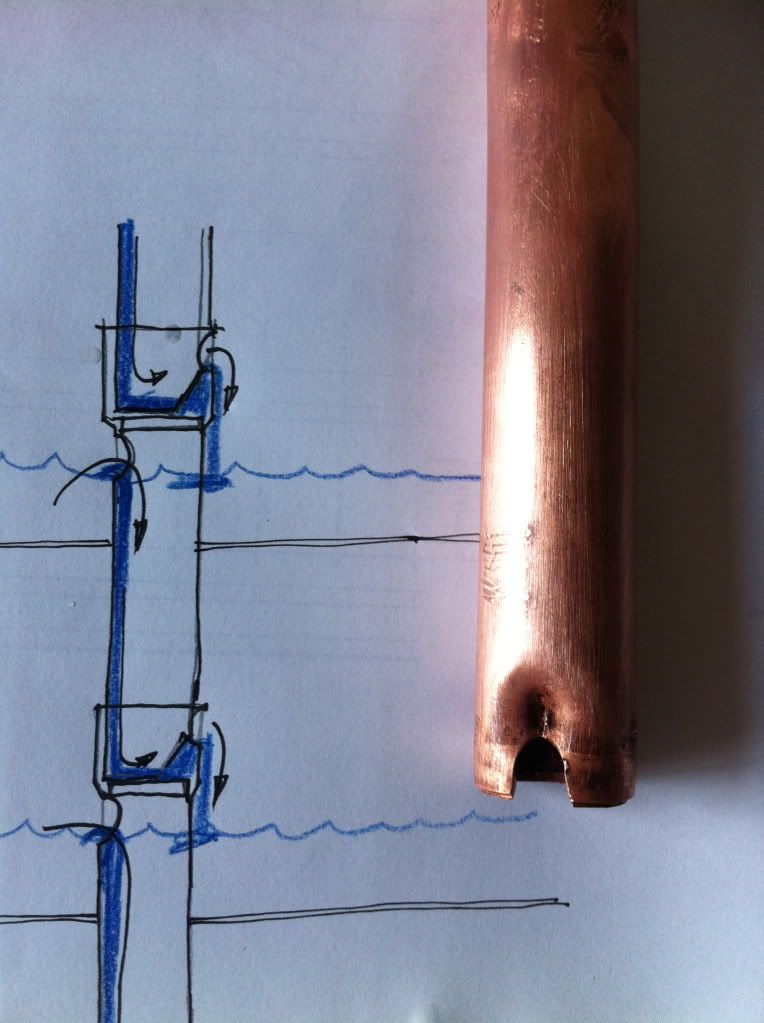
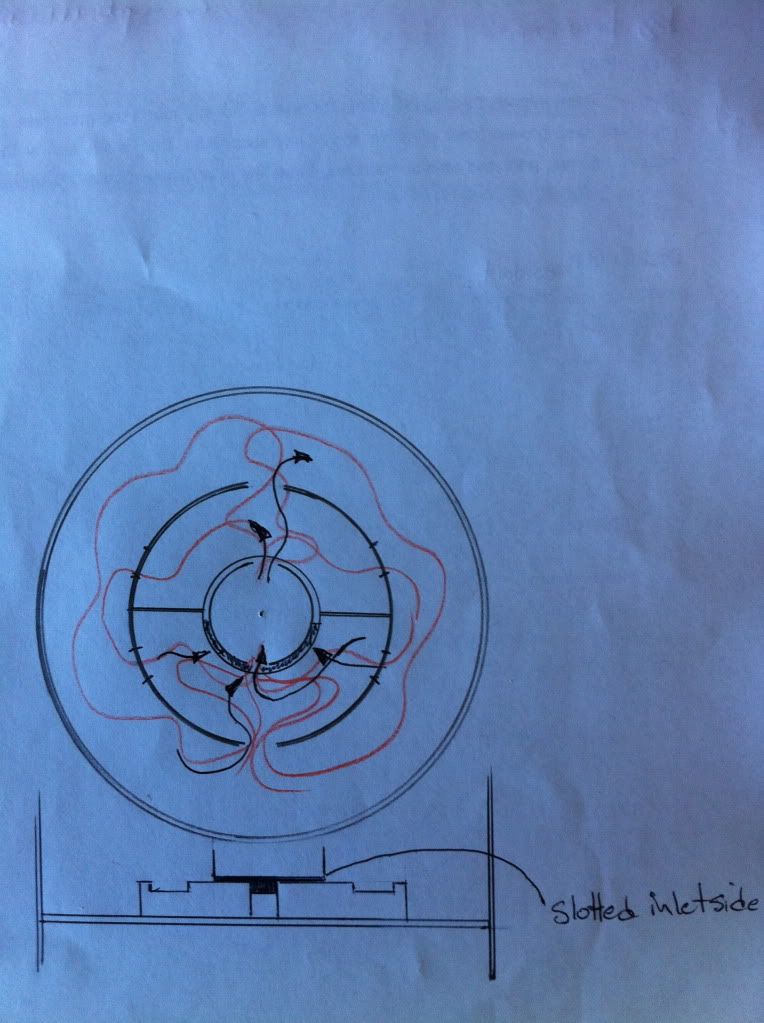
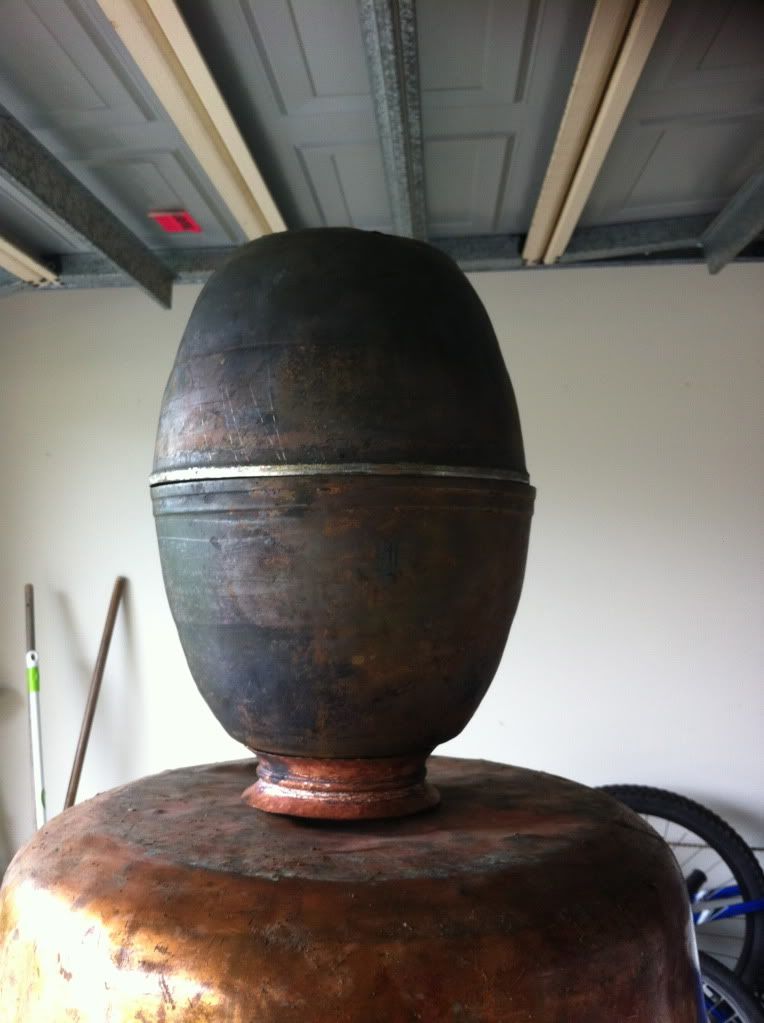
I have a 1800mm length of 4" copper so i am thinking that the column will be plated with a "Mac" sized reflux condenser sitting a top. Side inlet & outlets to save on height.
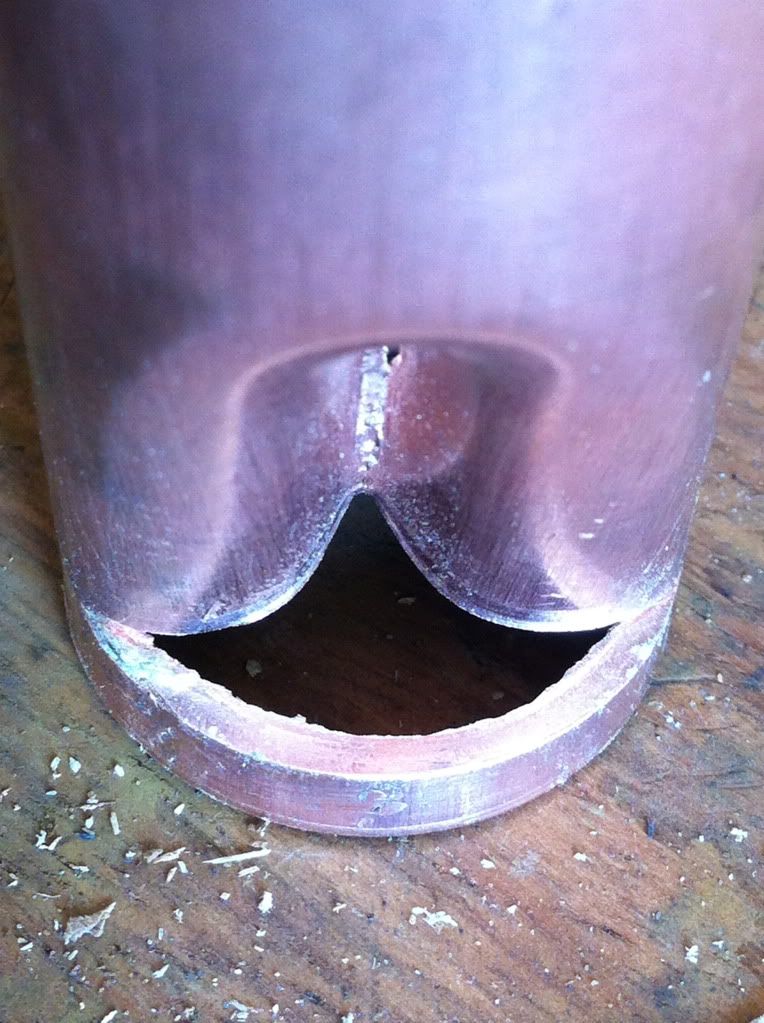
Number of plates to be decided. But I am thinking as many as possible given the 1800mm length. Plates will be bubble or the poppet valve idea I have posted earlier.
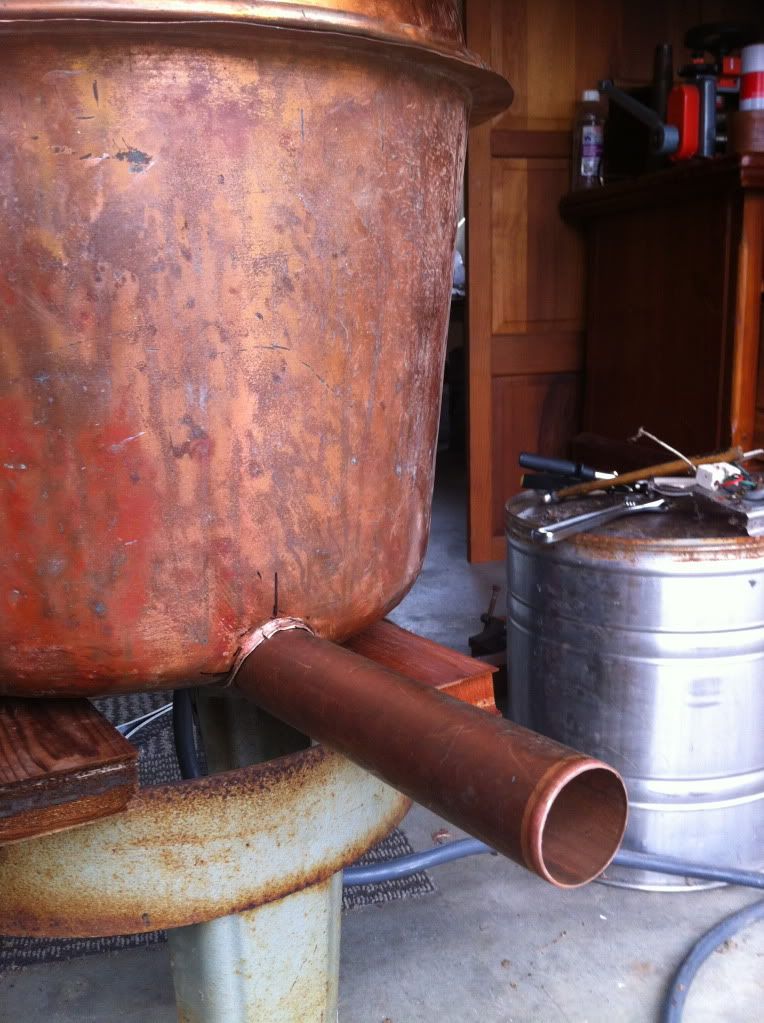
Connecting pipes? maybe 1" to keep the product velocity up.

The copper washing tubs are going top and bottom of the boiler.
Image
Image

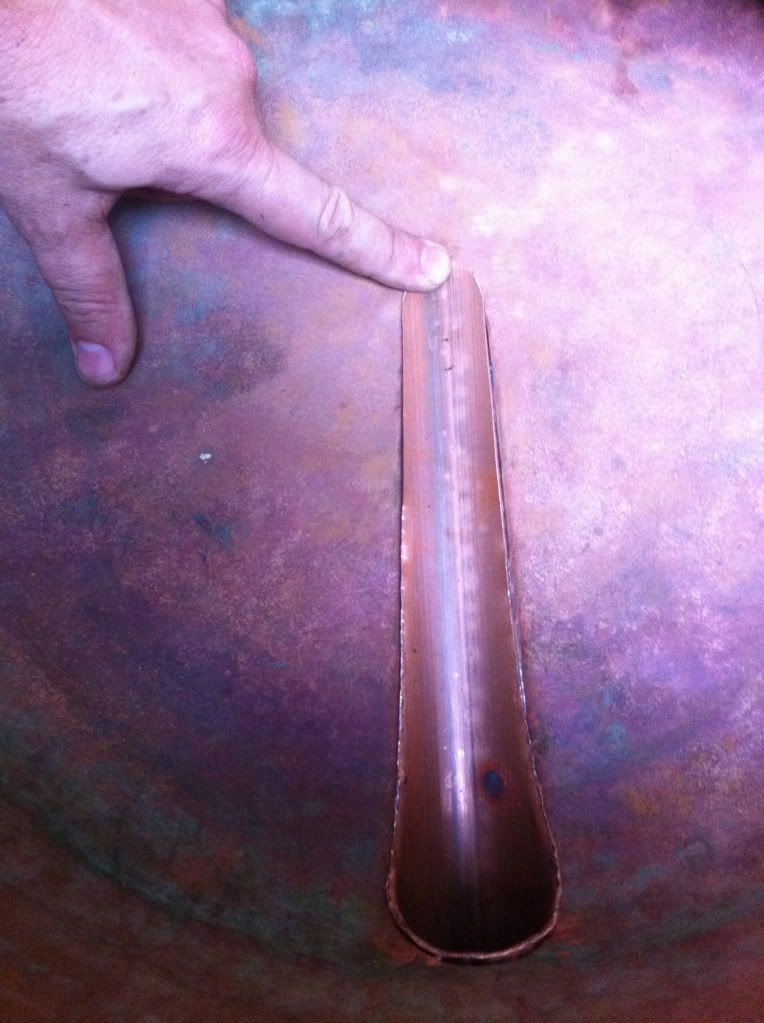
2" waste drain & a 4" inspection port so I can get my arm in.
Image
Image
The heating plan is to use steam. The steam supply is based on ex-espresso machine boilers with 1/4" copper pipe soldered to the insulated outside of the bottom boiler and a single internal coiled 1" copper heating tube fed from a separate espresso boiler. ( have access to a couple of these)
Modernity
 
Posts: 183
Joined: Sun Nov 27, 2011 2:34 pm
Location: Southern Highlands, NSW
equipment: I am currently refurbishing a 150 ltr mush tun.
Currently building a 150 ltr oil heated pot still, with 8" copper column.

Re: Mod's Build Log

Postby MacStill » Mon Mar 05, 2012 6:41 pm

Nice! :dance:

Are you planning a reflux return line to the boiler, or you got something else in mind?
MacStill
Lifetime Member
 
Posts: 16835
Joined: Fri Mar 18, 2011 1:40 pm
Location: Wide Bay QLD
equipment: Anything I choose :P

Re: Mod's Build Log

Postby Modernity » Mon Mar 05, 2012 6:45 pm

I will have to work out my heights as far as getting the drain to fall back to the boiler. If not it might end up as a thumper with a manual drain.
Modernity
 
Posts: 183
Joined: Sun Nov 27, 2011 2:34 pm
Location: Southern Highlands, NSW
equipment: I am currently refurbishing a 150 ltr mush tun.
Currently building a 150 ltr oil heated pot still, with 8" copper column.

Re: Mod's Build Log

Postby MacStill » Mon Mar 05, 2012 8:32 pm

Having both would be awesome, specially if you could valve it for one or the other :handgestures-thumbupleft:
MacStill
Lifetime Member
 
Posts: 16835
Joined: Fri Mar 18, 2011 1:40 pm
Location: Wide Bay QLD
equipment: Anything I choose :P

Re: Mod's Build Log

Postby stubbydrainer » Mon Mar 05, 2012 8:42 pm

Geeez, Mod
I really like ya drain mate, thats good work there IMHO :handgestures-thumbupleft:
stubbydrainer
 
Posts: 728
Joined: Sun Aug 28, 2011 9:42 pm
Location: Northern Rivers, NSW
equipment: 4" perf. plate bubbler,2 1/2" pot with a triple wall liebig,
Small 8L pot for experiments & Gin, 6Kw 80ltr electric boiler , P.I.D/PWM controller
1/2 share with SBB in a 3" boka,

Re: Mod's Build Log

Postby R-sole » Tue Mar 06, 2012 12:45 am

Make sure you play around with your 3 way valve before you install it. You can have them set so they are either one, the other or closed (bang) or set so they are either one, the other or both.

You want the last one for safety sake.
R-sole
 
Posts: 0
Joined: Mon Apr 18, 2011 4:15 am
Location: Northern NSW Australia
equipment: Keg based pot stiller. 3" vm for occasionally making product for macerations and redistillation.

Re: Mod's Build Log

Postby Modernity » Sat Mar 10, 2012 4:13 pm

Ruft out the outside casing design for the boiler this week. I have decided to insulate the bottom half of the boiler with urethane spray foam after I have soldered the 3/8 copper heating pipe to the outside of the boiler. The next problem was how was I going to clad it all? I started to look at my options and a oak barrel got roped into the deal. So what do you all think? a good sand and a few coats of vanish...
Image
Modernity
 
Posts: 183
Joined: Sun Nov 27, 2011 2:34 pm
Location: Southern Highlands, NSW
equipment: I am currently refurbishing a 150 ltr mush tun.
Currently building a 150 ltr oil heated pot still, with 8" copper column.

Re: Mod's Build Log

Postby Cane Toad » Sat Mar 10, 2012 4:37 pm

You'd want to have a good supply of Roids and a lifetime membership at the local gym if you're gunna start moving it around,even empty :laughing-rolling: :laughing-rolling: :laughing-rolling:
But on the other hand,it'll look fan-fucking-tastic when it's finished,and it'll probably be fixed in 1 place. With the varnished barrel and polished rabbit rooter it'd near give you a chubby :handgestures-thumbupleft: :handgestures-thumbupleft: :handgestures-thumbupleft:
Cane Toad
 
Posts: 2473
Joined: Thu Jul 28, 2011 9:14 pm
Location: ask punkin
equipment: where's my football :(

Re: Mod's Build Log

Postby Kimbo » Sat Mar 10, 2012 4:40 pm

I can see a definite pajama tightener being built :handgestures-thumbupleft:
Kimbo
Lifetime Member
 
Posts: 5461
Images: 0
Joined: Fri Mar 18, 2011 6:33 pm
Location: Perf WA
equipment: 4" bubbler with a 6"inline thumper

Re: Mod's Build Log

Postby Modernity » Sat Mar 10, 2012 5:34 pm

Started work on the plate tree for the column today. The whole tree design is sectional and relies on the plate/section below it to keep it straight.
Image
The plate is soldered to the centre pipe and each pipe sits in the expanded joiner of the pipe below. Between the downcomer stages sit a 25mm copper disc. Marked in RED on the drawing.
Image
I hope you can compare the actual pipe to the drawing next to it to work out whats going on. :think: With is exit lip the height of the lip can be adjusted to suit the opening in the pipe fitted. I figure I can make the opening up to 1/2" in the 1" down comer pipe. The size of the inlet seems not to be limited to any great extent.

These tree sections seem to be quick to build, I had three sections expanded, drilled and the crease in them in less than one hour. The 25mm disc just siting in between with a quick soft solder.
Image
Image
The bottom pipe will be soldered to the bottom try-clamp end plate on the column. I figure that if the first pipe is in the centre then the 4" plate will keep each subsequent plate and centre pipe in alinement all the way up. I intend to have the plates water cut just to save a bunch of hassle. But more on that later.
Modernity
 
Posts: 183
Joined: Sun Nov 27, 2011 2:34 pm
Location: Southern Highlands, NSW
equipment: I am currently refurbishing a 150 ltr mush tun.
Currently building a 150 ltr oil heated pot still, with 8" copper column.

Re: Mod's Build Log

Postby MacStill » Sat Mar 10, 2012 8:44 pm

Interesting concept for the downcomers, I think I like this idea but just hope it flows freely enough to prevent your plates flooding.

Cool !!!!

:mrgreen:
MacStill
Lifetime Member
 
Posts: 16835
Joined: Fri Mar 18, 2011 1:40 pm
Location: Wide Bay QLD
equipment: Anything I choose :P

Re: Mod's Build Log

Postby stubbydrainer » Sat Mar 10, 2012 9:08 pm

McStill wrote:Interesting concept for the downcomers, I think I like this idea but just hope it flows freely enough to prevent your plates flooding.

Cool !!!!

:mrgreen:


I'm a little worried about flooding of the plates here as well Mod,
stubbydrainer
 
Posts: 728
Joined: Sun Aug 28, 2011 9:42 pm
Location: Northern Rivers, NSW
equipment: 4" perf. plate bubbler,2 1/2" pot with a triple wall liebig,
Small 8L pot for experiments & Gin, 6Kw 80ltr electric boiler , P.I.D/PWM controller
1/2 share with SBB in a 3" boka,

Re: Mod's Build Log

Postby Modernity » Sun Mar 11, 2012 8:08 am

Mac n' Stub,

Do you see it as a inlet or outlet issue (or both)? :think:
Modernity
 
Posts: 183
Joined: Sun Nov 27, 2011 2:34 pm
Location: Southern Highlands, NSW
equipment: I am currently refurbishing a 150 ltr mush tun.
Currently building a 150 ltr oil heated pot still, with 8" copper column.

Re: Mod's Build Log

Postby MacStill » Sun Mar 11, 2012 10:49 am

With 1/2 holes it'll work ok, but in my experience using 1/2 downcomers plate flooding was an issue.... no problems now I'm using 3/4 though

I think you'll find you wont be able to throw much heat at it or your going to have flooding issues, it'll still work but your runs will just be slower.
MacStill
Lifetime Member
 
Posts: 16835
Joined: Fri Mar 18, 2011 1:40 pm
Location: Wide Bay QLD
equipment: Anything I choose :P

Re: Mod's Build Log

Postby stubbydrainer » Sun Mar 11, 2012 1:37 pm

:text-imwithstupid:
Having the outlet so close to the inlet creates a bit of a problem with opening up the bottom of the downcomer, open the top up as big as you are game,
IMHO It also reduces the time/distance( around to the other side ) the liquid has to go thru the Phase changes and ABV could suffer, you could put a couple of small radial weirs to direct it toward the outer circumference, the just let it find its way back to the downcomer inlet

cheers
stubbydrainer
 
Posts: 728
Joined: Sun Aug 28, 2011 9:42 pm
Location: Northern Rivers, NSW
equipment: 4" perf. plate bubbler,2 1/2" pot with a triple wall liebig,
Small 8L pot for experiments & Gin, 6Kw 80ltr electric boiler , P.I.D/PWM controller
1/2 share with SBB in a 3" boka,

Re: Mod's Build Log

Postby Modernity » Sun Mar 11, 2012 2:08 pm

Mac n' Stub,

So with that said "what is your gut feeling on whether the flooding at 1/2" is issue of a restricted inlet or a backed up outlet"? (I am not try to repeat the question).
I think this design has more inlet capacity then outlet options with this setup in 1" tube size. What I am asking is really should I max out inlet or outlet size?

Thinking about it, I seem to think the 1/2" flooding is more likely a outlet issue due to the need of the down coming liquid to push against the up going vapour pressure. Ideas anyone??? :think: :think: :think: :think: :think:

I have modified the outlet on this one. Double the opening area of the first prototype photos

Image
Image

Thought you may wish to see how I distorted the tube to make the opening. This is the jig I cut to push the outlet shape without wreaking the rest of the tube. One large flat bladed screwdriver and a couple of light taps and away you go.
Image
Modernity
 
Posts: 183
Joined: Sun Nov 27, 2011 2:34 pm
Location: Southern Highlands, NSW
equipment: I am currently refurbishing a 150 ltr mush tun.
Currently building a 150 ltr oil heated pot still, with 8" copper column.

Re: Mod's Build Log

Postby stubbydrainer » Sun Mar 11, 2012 8:19 pm

Mod
as you could probably appreciate It's a little hard to guestimate area's from a pic, but one thing that is becoming more prevalent here is the more you open the hole , the more you are crimping the tube off. ( although the 1" tube should handle it)
Depending how far into this build you are, I would try to put your plates in before there drilled ( you are not testing the perf plates , only the downcomer system ) and pour a cup of water down its gullet, but like I say'd, I don't know where you are at in this build but it would be 1 way to test the flow rate of the concept.

cheers
Stubs
stubbydrainer
 
Posts: 728
Joined: Sun Aug 28, 2011 9:42 pm
Location: Northern Rivers, NSW
equipment: 4" perf. plate bubbler,2 1/2" pot with a triple wall liebig,
Small 8L pot for experiments & Gin, 6Kw 80ltr electric boiler , P.I.D/PWM controller
1/2 share with SBB in a 3" boka,

Re: Mod's Build Log

Postby Modernity » Wed Mar 14, 2012 12:32 pm

Stubs,

I did what you said with a couple of foam coffee cups as plates. The issue was the inlet. I solved this by doing away withe 6mm hole and cutting a 5mm slot the inlet across one half of the 1" tube. So now both inlet & outlet can deal with water being poured in without hold up.

Time to address the tray circulation issue you mentioned. I have an idea to place a circler weir with a few castellations and apposed openings to create a full flow around the plate.

Top is plan view and bottom is side elevation for those who did drawing class at big school.
Image
and I just noticed my classy drawing does not show the the bottom of the downcomer tube :angry-banghead: :angry-banghead: :angry-banghead: below the plate :angry-banghead: :angry-banghead: :angry-banghead:
the wife says i should be working and not f***ing around with my toys.
Modernity
 
Posts: 183
Joined: Sun Nov 27, 2011 2:34 pm
Location: Southern Highlands, NSW
equipment: I am currently refurbishing a 150 ltr mush tun.
Currently building a 150 ltr oil heated pot still, with 8" copper column.

Re: Mod's Build Log

Postby maheel » Wed Mar 14, 2012 1:05 pm

Hey Mod

what happens to the steam (now water) once it has cooled off in the heat exchanger on the pot?
i have a few commercial coffee machines (and parts) and have been thinking about your design

will you run a steam boiler refill component and a Sirai pressure stat type set up as well ?
maheel
 

Re: Mod's Build Log

Postby devotus » Wed Mar 14, 2012 9:57 pm

Very cool, a build to watch for sure.

I'm interested how it all works out for you especially the steam heating and if you have any issues with the linking of each step.

Good luck Mod :handgestures-thumbupleft:
devotus
 
Posts: 222
Joined: Thu Nov 03, 2011 10:48 pm
equipment: copper alembic pot still
+
1.5 inch VM column

Next

Return to Plated Column Stills


Who is online

Users browsing this forum: No registered users and 119 guests

x